Key points to consider when installing Altro safety flooring
Correct subfloor preparation is key in achieving a successful installation. Any irregularities in the subfloor will be seen in the finished installation. The below information is not exhaustive and is provided as informational guidance only. If doubt persists, further advice should be sought via the relevant subfloor preparation manufacturer, British Standards for the installation of resilient floorcoverings or Altro Technical Services. Any failure directly related to inadequate subfloor conditions or subfloor preparation is the responsibility of the installer and/or flooring contractor once the installation has started. Consideration should be taken at an early stage regarding the age of the building or substrate, which will help ascertain if an integral sheet membrane is present. It should not be presumed where existing membranes are present, that they are effective and functioning. The subfloor must conform to the requirements of BS 8204-1:2003+A1:2009 and/or BS 8203:2017 and meet a minimum requirement of SR2.
Suspended timber floors should be adequately ventilated in accordance with BS 8203:2017. Structural timber substrates should be of a grade and thickness of timber appropriate for the construction of the floor, nature of the building, expected design loading and have a moisture content of max 8% MC (equivalent to 40% RH at +20°C). Signs of cupping or crowning should be noted and investigated prior to commencing. For best possible results all softwood and hardwood substrates including floorboards, wood-based panel boards (chipboard), particle boards including orientated strand board (OSB), hardwood floors that are fully bonded or mechanically fixed, should be surely fixed, free from deflection and differential movement, with all compromised tongue and groove joints removed or made good. In all instances, these should be overlaid with a minimum 5.5 mm thickness plywood to provide a smooth and even surface. Flooring grade plywood such as Hanson SP101 or similar should be used conforming to EN 636-2, BS EN 13986, and EN 314-2 Class 3. Refer to BS 8203:2017 Annex A and the Contract Flooring Association for guidance and advice for a suitable plywood specification. All perimeters, including board edges, should be fixed every 4” (100mm) and include 6” (150mm) centres using annular ring shank nails or screws, which should be 2.5 x the overall thickness of the underlayment. Consideration should be taken to the thickness of the substrate before choosing fixing lengths. All screw and nail head fixings must be flush or below the surface of the overlaid plywood and must not protrude above the surface. An application of feather finish or skim coat should be applied to the plyboard joints and fixings as a minimum requirement. Where floors are uneven, sanding can be undertaken to smooth out lips or ridges, alternatively a thicker gauge plyboard and/or a further application of a suitable primer and smoothing compound may be used. Structural, good faced plyboard may be used as a substrate or underlayment and can be directly overlaid following the guidance previously mentioned, however the joints must be tongue and groove bonded with an appropriate, water-resistant adhesive. In all instances, both structural timber bases including plyboard underlayments must be acclimatised and conditioned to allow for equilibrium prior to the installation.
Altro flooring can be installed on existing Hardwood/wood block floors EXCEPT at ground floor level. If above ground level, and there is no chance of moisture ingress, they should be securely bonded to the base, and be smooth, even and free of any oil or wax-based finishes.
Hardwood/wood block floors should be overlaid with flooring grade plywood first, as set out in the overview. All compromised tongues must be replaced or made good and any unevenness, lips or ridges should be sanded smooth before overlaying. Hardwood floors should be tested, measured and checked for equilibrium moisture content prior to commencement. All results or findings should be recorded and documented. In all instances, a maximum of 8% MC should be observed.
It is common for some hardwood floors to creak under load at particular times of the year.
In all instances, the existing expansion gap must follow through the preparatory material and final finish, and be covered with a suitable trim, without restricting the hardwood. Where the skirting board covers the expansion gap, adequate gap should be left at the perimeter and continue through all preparatory material and product, which should be covered with a suitable trim. Floating floors including hardwood are not deemed suitable to be overlaid.
Additional consideration should be taken to the thickness of hardwood which is to be covered, as these are often sanded and in some instances, will not accept the recommended length of fixings. If any doubt exists, contact Altro Technical Services for further advice.
All ground level floors should have a suitable moisture barrier and for glued down floors must not exceed 75% RH. If any doubt exists a surface applied damp proof membrane (DPM) or other appropriate moisture protection system should be used in accordance with BS 8203:2017. If in any doubt please contact Altro Technical Services for more advice.
Altro safety flooring should never bridge an expansion joint. The joints need to be brought through to the final floor finish, and the floor coverings should finish either side of the joint. If required a suitable expansion joint cover strip can be used - please contact Altro Technical Services for more advice.
Extra consideration should be given when installing on raised access floors. To avoid grin through of joints and other related issues, correct and proper preparation is essential, including the use of plywood as an overlay. For further information please speak to the Altro Technical Services.
Altro recommends the use of AltroFix 19 Plus in wet areas such as bathrooms and kitchens. For other areas please follow adhesive manufacturers recommendations. Spread the adhesive, following the adhesive manufacturer’s instructions, including trowel size and coverage rate, ensuring that the correct notch size is maintained throughout the installation. If the notch shows signs of wear the trowel should be renewed immediately. Excess adhesive should be removed with a cloth with a neutral detergent in the case of acrylic adhesive or with alcohol for two component adhesives. Removal of excess adhesive should be done as work progresses and whilst the adhesive is still wet.
Please note: Backing materials may vary. All Altro fleece backed products need to be installed whilst the adhesive is wet, however instructions may differ dependent on subfloor type.
Altro flooring should be laid in accordance with the Code of Practice BS 8203:2017. It is essential the flooring is checked for any possible faults prior to installation. Claims against guarantee for colour, batch or obvious material defects will only be considered if the flooring has not yet been installed. The area should be at a steady temperature of between 18°C and 27°C with a relative air humidity of between of 35% and 65% RH for at least 48 hours prior to, during and for at least 48 hours after completion. The material should be stored for at least 24 hours at a room temperature of not below 18°C. If the floor covering has been stored or transported immediately prior to delivery at a temperature of less than 10°C, then the acclimatisation period should be extended to 48 hours. Where conventional and commissioned in situ heating sources are unavailable, alternative heating methods should be used such as portable electric heaters, fossil fuelled heating should be avoided. In open areas or large sites without internal doors, temporary sheeting can be used to section off to allow for adequate temperature control. In all instances, the building must be watertight and include the installation of all external doors and windows. Areas containing glass such as wall to ceiling windows should be shaded to prevent heating of the substrate or underlayment for this period.
In areas where higher floor temperatures are to be expected (e.g. conservatories or south facing floor to ceiling windows), the flooring should be fully bonded with a 2-part polyurethane or high temperature resistant adhesive. Areas exposed to intense sun radiation should be fitted with effective sunblind systems and the use of a UV protection film on the glass should also be considered. High ambientair and surface temperatures can lead to changes in drying times of the adhesive and may also lead to dimensional and colour changes in the floor covering.
Ensure that the material used in any one area is from the same manufacturing batch, and on large projects where multiple rolls are used, lay areas consisting of sequential roll numbers. Due to the differences and designs within the Altro floor covering ranges, products vary in the requirements of the direction of lay. Further information can be found on the roll label, alternatively contact Altro Technical Services for more information.
Roll the product out face upwards and cut the flooring the flooring into required lengths and lay freely for a minimum of 2 hours for conditioning before fitting. Altro flooring MUST be back rolled after being cut into required lengths to take out any tension in the product. Any liquid or contaminant ingress from above including damage / incorrect and / or poor installation techniques will invalidate the product guarantee.
The surface temperature of the subfloor must not be below +10°C, and for installations over underfloor heating must be between +18°C and +22°C. Prior to installation, all materials including floor covering, primers, tapes, weldrod and accessories should be allowed to reach room temperature.
Before commencing, consideration should be taken towards joint layout and product positioning. These should be kept to a minimum. Where possible, refrain from laying joints in doorways, high traffic areas and when laying against glazed windows, place the joints facing the windows to minimise the appearance of the joint. When laying high design products such as Altro Wood, the direction of pattern should be of such that the design is in a linear format to the area or main doorways. Altro Illustra should be reverse laid, i.e. the lengths are laid against each other in opposing directions. Consult the label for the relevant instructions.
Altro flooring can be laid using all traditional installation finish types such as flat fit and self-coved in conjunction with “sit on” or “set in” skirtings and should be rolled out face up. Once laid out to relax, back rolled and conditioned, all joints should be overlapped by an optimum of 20mm and cut in to form a tight joint. It is prerequisite with all Altro resilient floorcoverings that all factory edges are trimmed and removed. Selvages must be removed for pattern alignment. The patterned wood ranges will require the pattern to be matched from sheet to sheet and the selvedge should be cut back to the nearest plank (for further information contact Altro). These can either be cut in before or after applying the adhesive and will depend upon the preference of the flooring installer, however, it should be borne in mind that in large installations if the joints and / or the perimeter has been cut in, any movement of the sheet whilst placing it into the adhesive will create a problem. Joints can be cut in at any stage during the process by using traditional methods. When self-coving, the adhesive should be applied at the foot of the cove former, and a suitable approved contact adhesive used on the cove former and vertical surface, including the rear of the product where this is to be coved. Once satisfied that the flooring is laying flat turn back the sheet, clean off the back and apply the adhesive to the subfloor in accordance with the manufacturer’s instructions. After the specified open time, which can depend upon the subfloor, underlayment and ambient conditions, place the floor covering back into the adhesive pushing out any air bubbles. Remove any excess adhesive immediately and depending upon the adhesive used, roll the whole area with a floor roller both width ways and length ways. Once satisfied, repeat on the adjacent side. A micro gap should be left between the flooring and perimeter edge to be sealed later. Once fully installed, all joints and mitres within the installation should be hot welded with the matching colour Altro Weldrod™.
Where possible, allow 24 hours between laying and welding, to ensure the adhesive is fully cured. After cutting in and adhering the sheet vinyl flooring, and following the initial curing period of the adhesive, all joints including internal and external mitres must be hot welded with Altro Weldrod, using a hot air welding gun fitted with a 5mm high speed welding nozzle. We recommend the use of an anti-glaze nozzle when welding Altro Suprema. Before starting to weld, a test weld should be undertaken on a scrap piece of material to ensure all parameters are met. Grooving should be carried out using a P-Type, U-shaped grooving tool, approximately 2/3 the depth of the product, in an even manner where the product is grooved either side of the joint. Care should be taken not to expose the substrate, underlayment or existing product as this can lead to failure. All internal coved mitres should be grooved to remove any surface coatings that may impair fusion.
The internal and external mitres on the coved sections should be welded first. Turn the speed nozzle at the end of the welding gun to the up position, for easier starting, or use an Altro coving speed nozzle. Once the mitres are finished, turn the nozzle to the down position to hot weld the grooved floor joints.
After a long period of use, the filter of the welding gun may become clogged with debris. This must be kept clear to reach the optimum weld temperature. Welding should continue using an appropriate heat, at a steady and continuous speed.
Trimming of the weldrod should be undertaken in two passes. Firstly, trim the weldrod using suitable trimming tool including guide or sledge and allow to cool for a minimum of 10 minutes. Once cooled, final trim the weldrod flush to the surface of the flooring. Cold or chemical weld including AltroMastic 100 is not a suitable welding method.
It is considered best practice to seal Altro floor coverings. All flat laid areas should have a micro gap left between the flooring and perimeter / any exposed edges and be sealed with AltroMastic 100. This also applies to door frames and around fixtures and fittings and for sealing of pipes, toilet pans, door frames etc.
Please note: while other mastics are available, only AltroMastic 100 has been fully tested with our flooring systems. Advice should be sought from the relevant mastic manufacturer regarding suitability and/or compatibility, before an alternative mastic is used. The application of mastics must be performed by a suitably trained and competent installer. Unless specifically agreed, this should not be assumed to be within the flooring contractor’s scope of work.
In areas that are subject to moisture spillage, the complete installation must be sealed i.e. with the use of conventional clamping or welding type drain gulleys and access covers, and the sealing of pipes, around toilet pans, door frames etc. and between the junction of Altro flooring and wall covering or other floor surfaces with the use of appropriate sealing methods. Refer to the Altro detail diagram sheet of the appropriate finishes.
Underfloor heating must be fully commissioned and taken through two complete cycles of heating up and cooling down prior to the floor covering being installed. The temperature at the underside of the floor covering, i.e. the subfloor / tape bond line, should never exceed 27°C. The relative humidity of the subfloor must be 75% RH / 2 CM% or less. In instances where this exceeds 75% RH / 2% CM, further applications of surface applied damp proof membranes will be required.
Glued down Altro safety flooring must be installed while the underfloor heating is switched off, (while switched off, an alternative heating source should be used. Refrain from using fossil fuelled heating). It should be switched off 48 hours prior to the floor covering installation and should remain off for the duration of the installation and at least 48 hours after completion. After the 48 hours have elapsed the temperature of the heating system should be increased gradually over several days, by 2-3°C per day, to prevent thermal shock until the desired room temperature is reached.
Please contact Altro Technical Services for more advice on installing Altro safety flooring over underfloor heating.
Altro Walkway™ 20SD should be installed following the same procedure as standard sheet. But the recommended conductive adhesives must be used and laid into wet to ensure adequate transfer to the product. Double dropping the product can be beneficial when using copper strips (refer to the Altro adhesives guide). The use of copper strips, etc, will depend upon the requirements and standards that the client needs to achieve (for further information contact Altro Technical Services).
Altro flooring should be covered and protected from all other trades with a suitable non-staining protective covering. Selfadhesive protection should never be used directly on the floor surface. The use of temporary protection is particularly pertinent when relocating heavy furniture or equipment.
Please ensure that the wheels of any rolling loads are in good condition and are freewheeling. Castor chairs should have Type-H or W wheels and additional installation tape should be used. Rubber tyres or wheels can cause oxidisation when in prolonged contact with PVC. In instances such as these, protective mats or pads should be used.
Adequate protection should be used on table legs, chairs and furniture such as cups, caps or pads.
The main or building contractor must provide an initial ‘builders clean’ and all cleaning products used must be suitable or applicable to the level and type of soil. In all instances, preventative methods should be followed.
The contractor must provide the customer with cleaning and maintenance instructions. These can be downloaded from www.altro.com. Correct cleaning and maintenance have a decisive influence on the service life and preservation of the value of the installed flooring. Applications such as dressings or maintainers should be avoided on safety flooring, as this may impair slip resistance. Further information or advice on cleaning should be sought from Altro.
Soiling can be greatly reduced by providing suitably dimensioned “walk-off areas” with appropriate entrance matting at the entrances to buildings. These should have a length of at least 4–6 strides, and must be a minimum of 3 meters deep, with an optimum of 6 meters preferable.
Please note: A distinction should always be made between adhesive and non-adhesive dirt. Non-adhesive dirt should be removed using a dry method of cleaning. Loose dust, for example, can be removed simply by brushing or using a vacuum cleaner with a hard floor brush.
Further information or advice on cleaning should be sought from Altro.
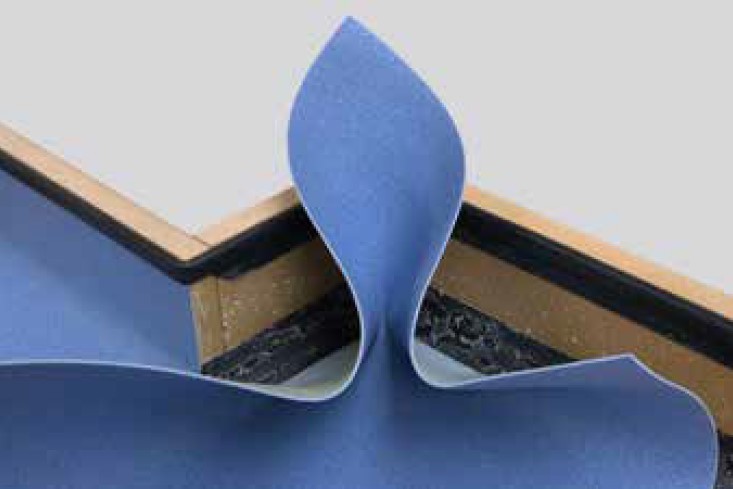
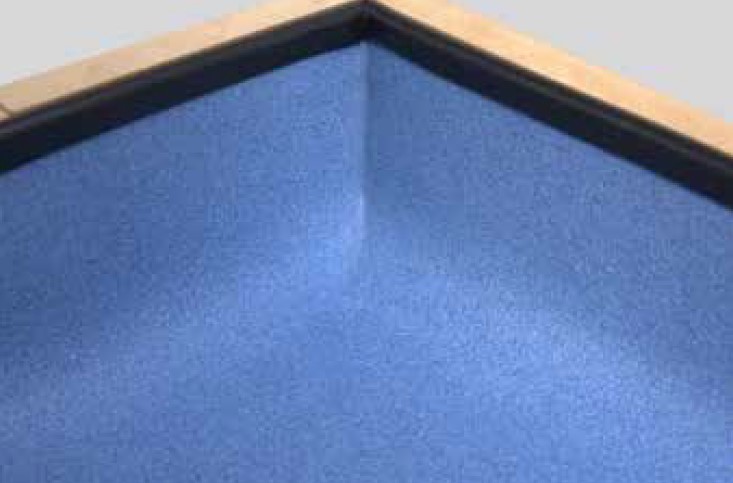
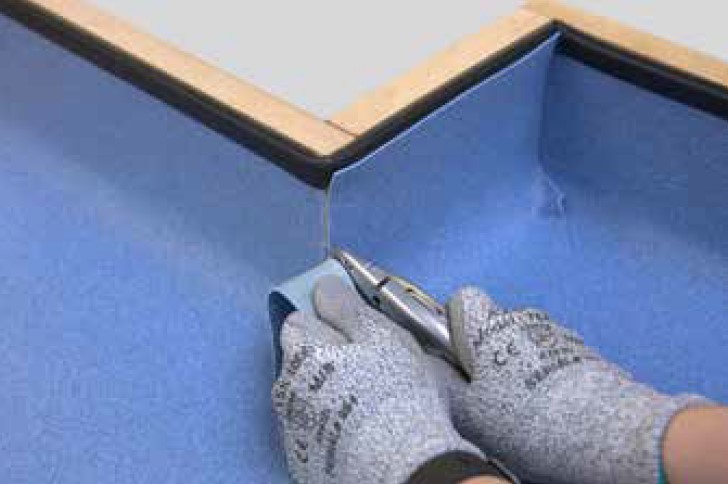
1. Once the main flooring is laid and adhered, push the flooring into the internal corner as far as possible, ensuring that the bottom edge of the flooring is touching the lower edge of the cove former where it meets the subfloor.
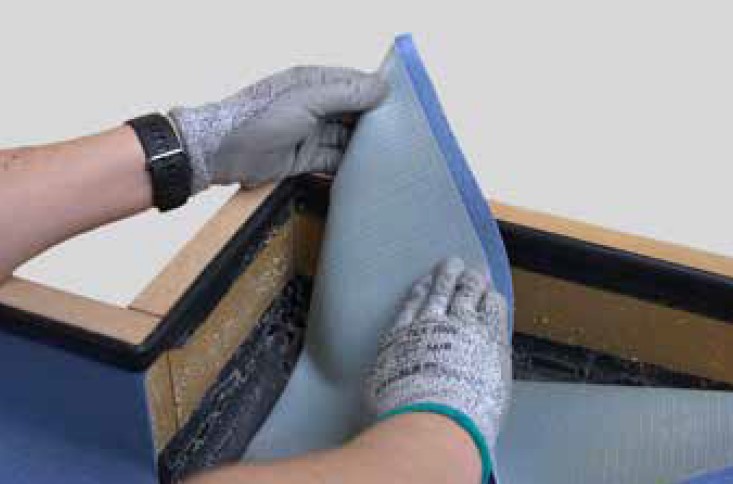
2. Pinch the two sides of the flooring together so that the top edges are parallel/in line with each other.
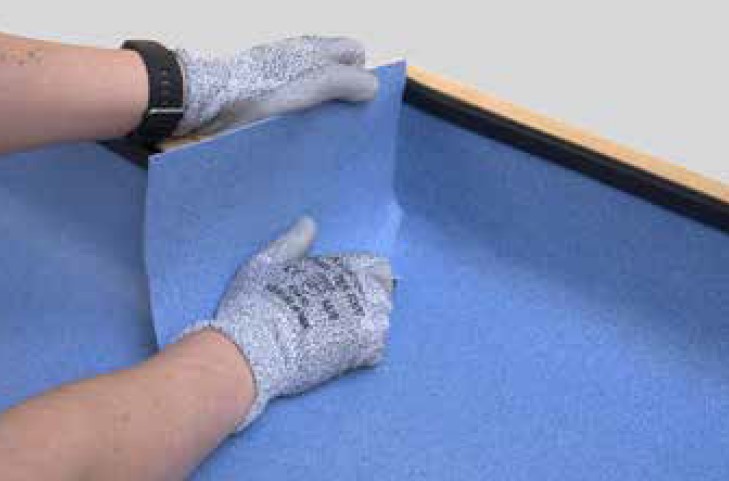
3. Make a cut from the base out to the top of the flooring along the pinched line.

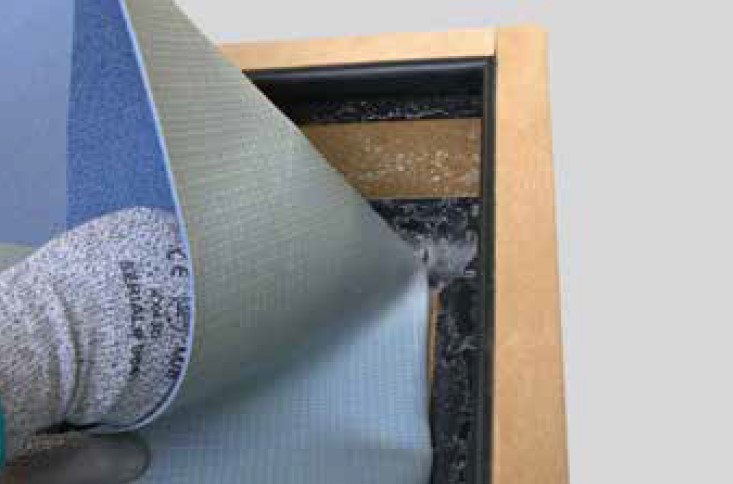
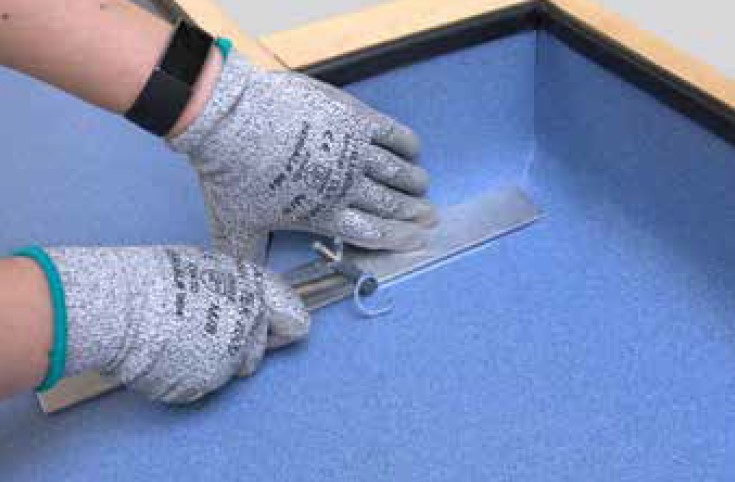
4. Fold in one side of the mitre and carefully cut off the surplus material.
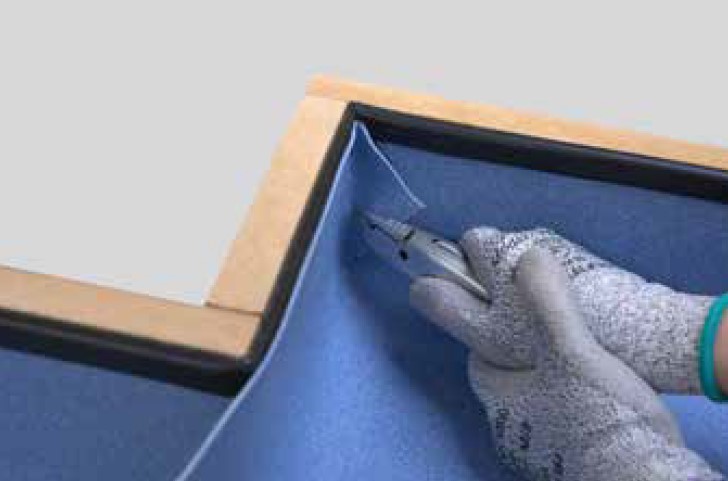
5. Fold in the second side and carefully cut in to complete the joint.
6. Adhere and hot-weld the joint.
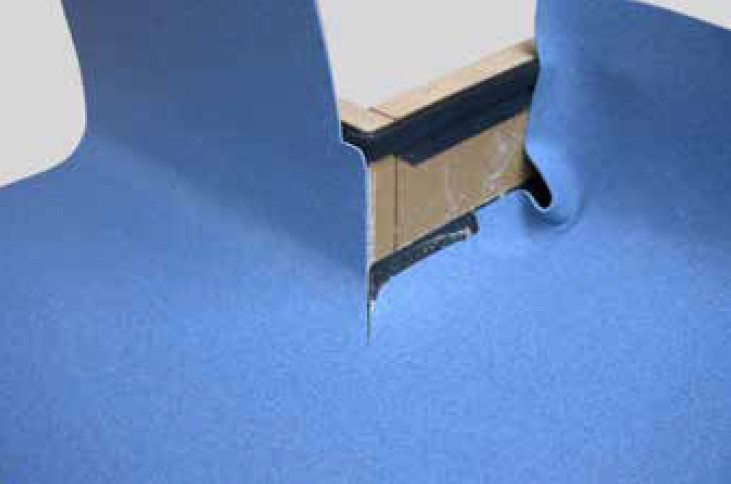
1. Fit the flooring to the closest/front wall. Cut down the external mitre, ensuring you have left sufficient excess to drop back into the internal mitre.
2. Fit the flooring to the back wall. Trim off the excess height and cut in the internal mitre. Bring this cut down the corner until it reaches a minimum of 20mm from the bottom edge of the cove former. Continue the cut parallel to the cove former until it has joined up with the external mitre.
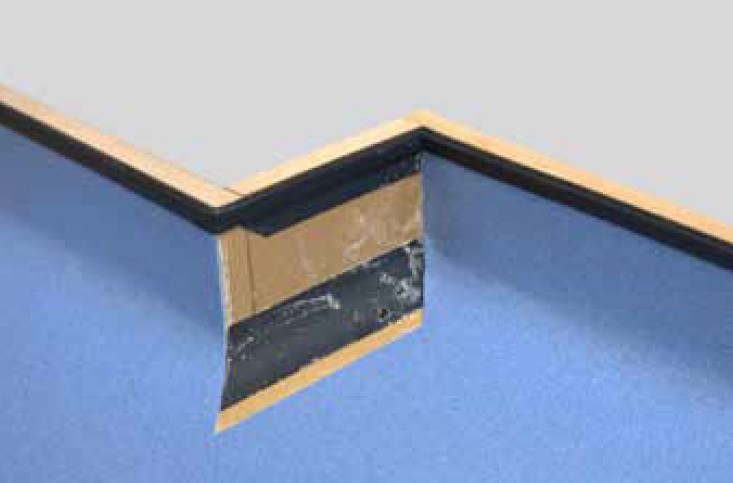
3. Using a pre-adhered section of flooring roughly cut to the size of the infill section, fit tightly into the internal mitre before adhering the section to the wall and cove former.
4. Carefully trim off all excess flooring, leaving a tightly fitted infill section.
5. Groove all joints.
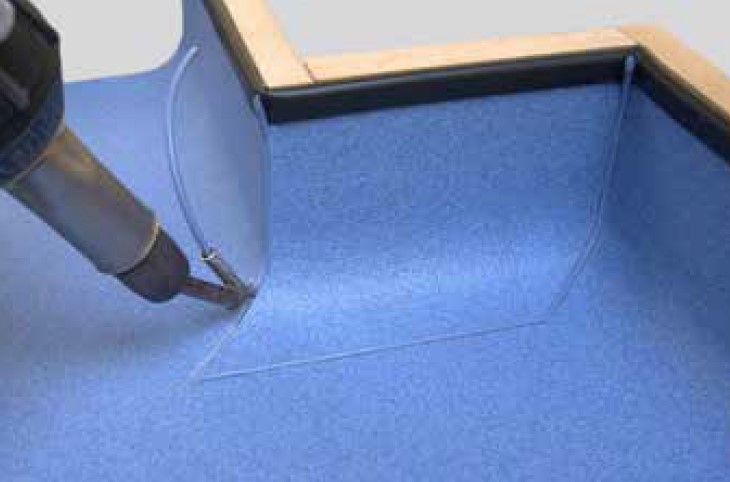
6. Hot weld all joints starting from the top.
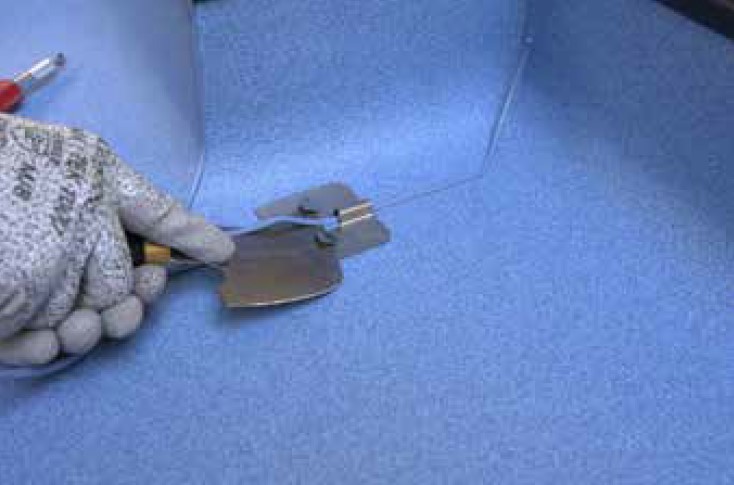
7. Allow the weldrod to cool completely, and trim off excess weld using sledge and spatula.
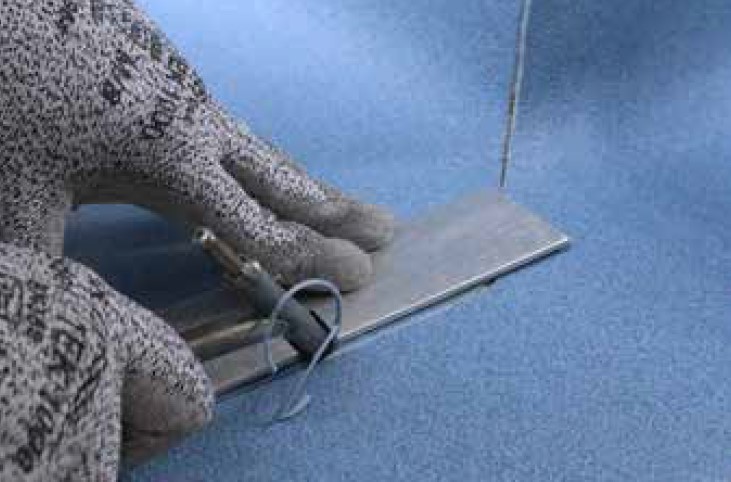
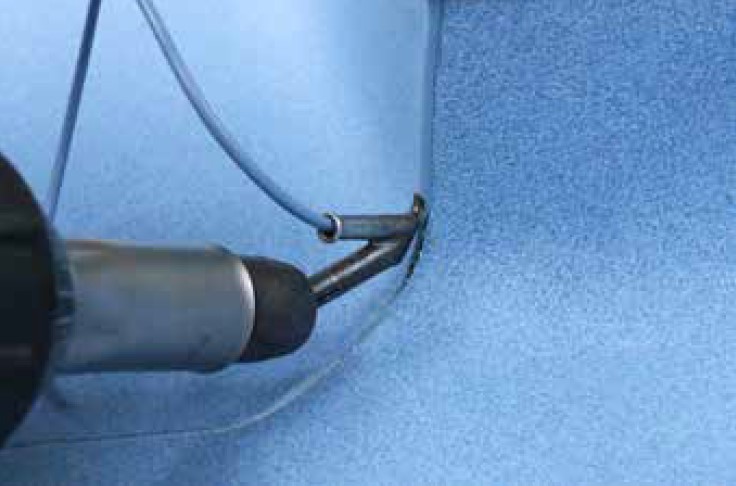
1. Groove both the lower section and upper sections of the joint.
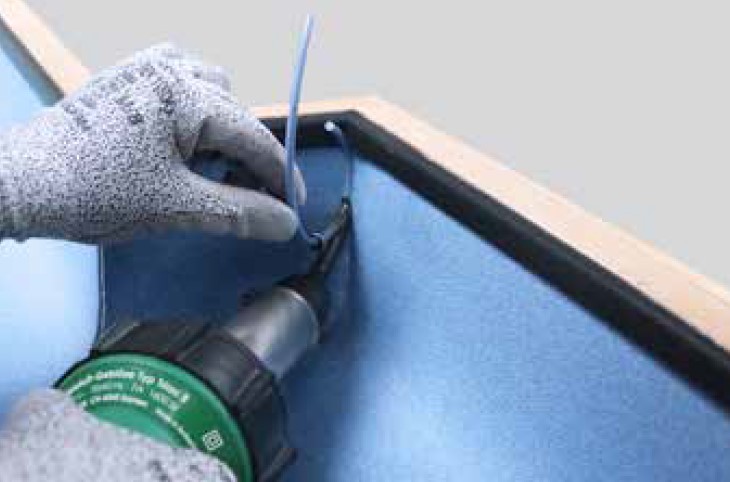
2. Thread the weldrod through the nozzle and weld the joint starting from the top.
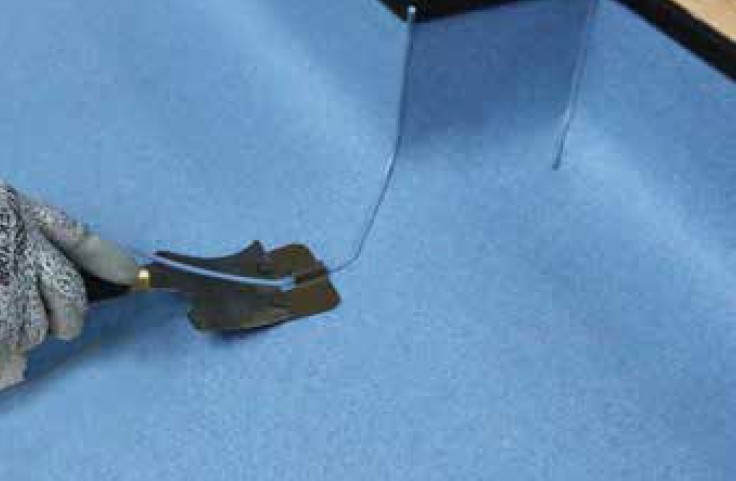
3. Trim the weldrod with the round router blade.
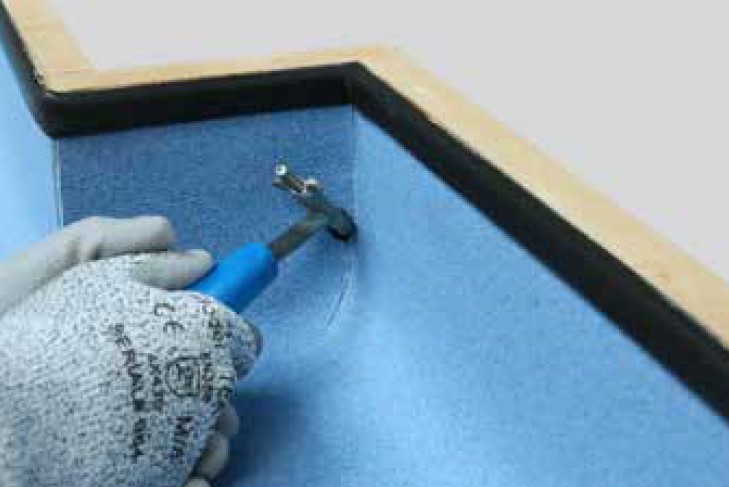
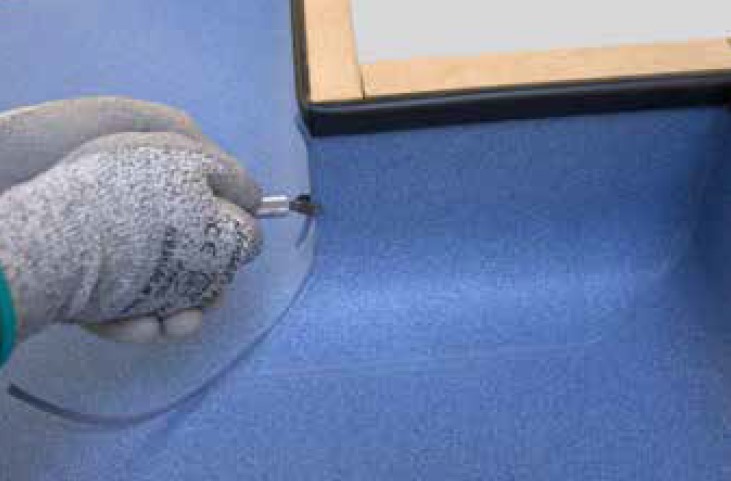
1. Use a concave blade to prepare the upstand and cove former sections, creating a ‘V’ section in preparation for hot welding.
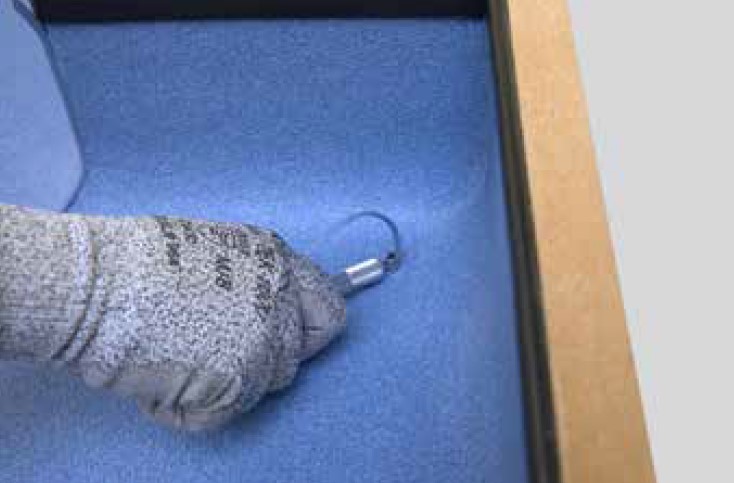
2. Groove the join on the flat section of the floor.
3. Weld the external mitre from top to bottom, being careful not to press the weldrod too firmly on the upstand section as this can cause damage to the flooring.
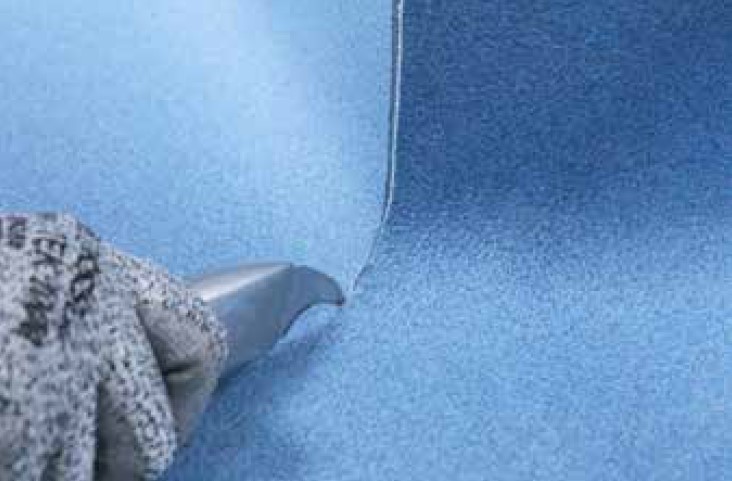
4. Allow the weldrod to cool completely, and trim off excess weld using sledge and spatula on the lower section.
5. Chamfer off the external mitre with the square router blade.