Can't see the region you're looking for? You can find a list of our global locations here
Key Points to consider when installing Altro safety flooring
Altro safety flooring should be laid in accordance with Code of Practice BS8203:2001, (& relevant Country standards). The material should be stored for approximately 24 hours at a room temperature not below 14°C. When Installing the area should be at a steady temperature of a minimum of 14°C for at least 48 hours prior to, during and for at least 24 hours after installation.
The material should be checked for any possible faults prior to installation and should be cut into lengths for conditioning for a minimum of 2 hours before installation.
Ensure that any material used in any one area is from the same manufacturing batch and that all widths are laid in the same direction.
Pattern ranges of Altro safety flooring will require the pattern to be matched.
Ensure that the subfloor and walls are clean, dry and free from any dusts or contaminants that may affect adhesive performance. Check any painted surfaces for suitability of selected adhesive, (an adhesion test is recommended prior to starting installation). Ensure that the junction between wall and floor is suitable to receive vinyl floor skirting finish and repair using suitable filling compound if required. On absorbent surfaces prime substrates with suitable primer in line with adhesive manufacturers recommendations.
Mark wall to required height to suit requirements (usually 100-150mm).
Apply adhesive in accordance with manufacturer’s instructions to prepared wall.
Install Sheet flooring with allowances to turn sheet flooring up to required skirting height in suitable adhesive up to floor / wall junction, ensure full contact with the floor area and expel any air bubbles, roll floor using suitable flooring roller.
Apply suitable adhesive to rear of sheet flooring in accordance with manufacturers instruction, (please note the incorrect use of a contact adhesive may cause discolouration to the surface of the flooring if the surfaces are brought together before the adhesive has had time to dry).
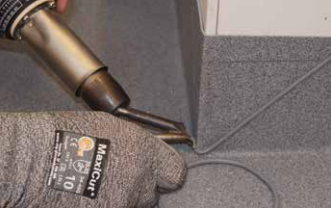
Using a suitable roller press the sheet flooring firmly into the junction between wall and floor. Using a hand roller or rubbing hammer ensures full contact between sheet and wall. The use of heat gun at a suitable temperature during installation improves the contact between sheet flooring, wall and adhesive.
Fold sheet flooring into walls and cut down in excess material 5mm above finished floor. Press one side of the excess material into the corner using a roller and return material around corner. Cut sheet to an angle of 45 degrees.
Overlap cut corner with remaining sheet flooring and trim to first piece ensuring tight seam. Roll sheet with hand roller on completion.
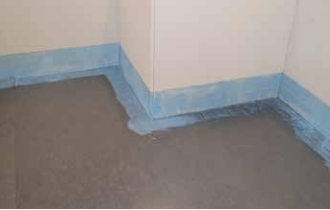
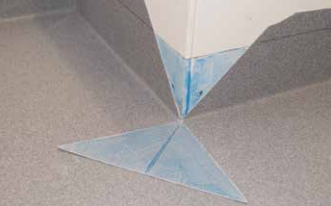
Fold sheet flooring into corner between floor and wall on one side, cut a 45 degree angle to 5mm above floor finish to edge of external corner, fold sheet flooring into corner on adjoining wallwall, (see photo 5). Prepare triangular fill piece and groove rear of sheet to maximum 50% depth.
Place triangle piece over existing sheet and cut through to ensure tight butted seam.
A 3mm groove must be cut evenly along each corner seam. Welds should be done using a hot air welding gum with a 5mm high speed welding nozzle. Allow corner welds to cool to a suitable temperature before trimming using a suitable tool.
1. Apply adhesive to the floor and wall where material is to be coved.
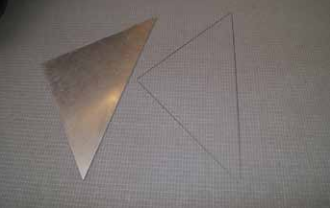
2. Use triangular pattern to cut corner shape from material.
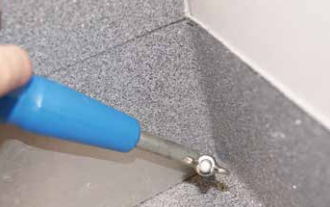
3. Groove the back of material out approximately 1/3rd depth at the point where the pad out section will be on the corner of the wall.
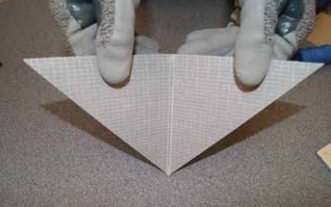
4. Corner section before applying adhesive, centre grooved to allow material to be formed around corners.
5. Flooring with adhesive applied to the backing and grooved ready to install.
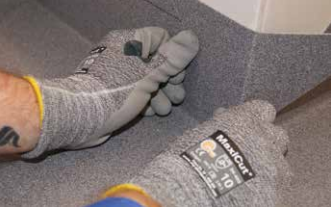
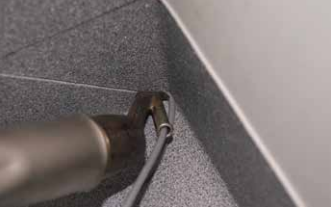
6. Place material into position.

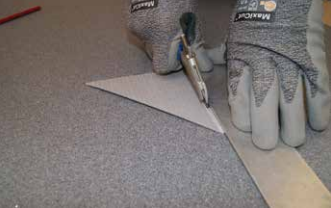
7. Trim flooring as required to form a tight neat joint.
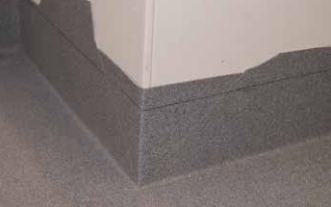
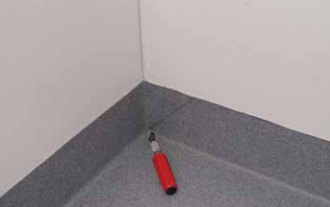
8. After trimming, roll material with a hand roller to ensure good contact with the adhesive surface and eliminate any trapped air.
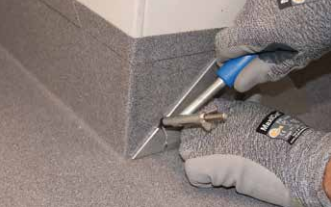
9. Groove flooring on external corner using the triangular template as a guide.
10. Groove flooring in internal corner using the triangular template as a guide.
11. Weld external corner.
12. Weld internal corner.
13. Trim weld back to the surface of the material.
NOTE: “Altro Ltd” (“Altro”) endeavours to ensure that advice and information given in Product Data Sheets, Method Statements and Material Safety Data Sheets (all known as Product Literature) is accurate and correct. However, where Altro has no control over the selection of its products for particular applications, it is important that any prospective customer, user or specifier, satisfies him / herself that the product is suitable for the intended application. In this process, due regard should be taken of the nature and composition of the background / base and the ambient conditions both at the time of laying / applying / installing / curing of the material and when the completed work is to be brought into use.
However, as site conditions and the execution of the work are beyond our control, we accept no resultant liability.
Altro’s policy is one of continuous research and development and we reserve the right to update our products and information at any time without prior notice.